Git/GitHub基礎 | Git
Git/GitHub基礎
- インストール
- config
- ブランチ
- 元に戻す
- diff
- Gitの追跡停止
- log
- detached HEAD
- リポジトリ管理されているファイル一覧
- GitHub
- git-pr-release
- トラブルシューティング
インストール
Homebrewでインストール
Homebrewでインストールする/usr/local/Cellar/gitにバージョンディレクトリを作成してインストールされる。
2022-05-06時点最新の2.36.1は以下のようになる。
/usr/local/Cellar/git/2.36.1
gitの便利ツールが含まれるcontribは以下にある。
/usr/local/Cellar/git/2.36.1/share/git-core/contrib
例として diff-highlight を使用可能にする。
以下バイナリファイル``から/usr/local/binにシンボリックリンクを作成する。
/usr/local/Cellar/git/2.36.1/share/git-core/contrib/diff-highlight
$ ln -s /usr/local/Cellar/git/2.36.1/share/git-core/contrib/diff-highlight/diff-highlight /usr/local/bin/diff-highlight

# <a id="config">初期設定</a>

概ね、`git config --global`コマンドは、`~/.gitconfig`を追記する。

## 設定

例えばユーザー名とメールの設定は以下のとおりです。

```shell
# プロジェクト
# /path/to/project/.git/configへ追加
$ git config user.name xxx
$ git config user.email xxx@xxx
# ユーザー
# ~/.gitconfigへ追加
$ git config --global user.name xxx
$ git config --global user.email xxx@xxx
# システム
$ git config --system user.name xxx
$ git config --system user.email xxx@xxx
設定値表示
# プロジェクト
$ git config --list
# ユーザー
$ git config --global --list
# システム
git config --system --list
ブランチ
- ローカルリポジトリ
- master
- origin/master(リモートトラッキングブランチ)
- リモートリポジトリ(origin)
- master
Git で「追跡ブランチ」って言うのやめましょう - Qiita
リモートリポジトリ
リモートリポジトリ表示
$ git remote -v
リモートリポジトリ詳細表示
$ git remote show origin
リモートブランチをチェックアウト
$ git fetch origin <ブランチ名>
$ git checkout <ブランチ名>
ref.
https://dev.classmethod.jp/articles/how-to-checkout-remote-branch/
コミットを指定してブランチを作成
$ git checkout 7aba6ab4b94bc5 -b feature/some-function
https://qiita.com/wnoguchi/items/dabe6e05388faf75f00c
ブランチからブランチを作成
$ git checkout -b
https://www.delftstack.com/ja/howto/git/git-create-branch-from-another-branch/
元に戻す(Undo)
HEADの内容へ戻す
git reset は、 HEAD を 履歴 の 中 で 移動 さ せる コマンド* 6 だ が、 ステージ や 作業 ツリー の 内容 を HEAD に 合わせる のにも 使わ れる。
冨永和人. わかる Git (Kindle の位置No.457-458). puboo. Kindle 版.
$ git reset                   // HEADの内容をステージへコピー 作業ツリーは変更なし
git reset -- /path/to/file  // 特定のファイルのHEADの内容をステージへコピー 作業ツリーは変更なし
$ git reset --hard // HEADの内容をステージングに加え作業ツリーへもコピー
ステージングの内容へ戻す
$ git checkout -- path/to/file
$ git checkout .  // 全てファイルの変更を戻す
resetであるコミットまで戻す
HEADが指定のリビジョンまで戻るのはすべてのオプションで共通です。 オプションによりステージング、作業ディレクトリの状態がことなります。
$ git reset <hash> --hard
- –soft HEADのみ戻します。ステージング、作業ディレクトリは戻しません。
- –mixed (デフォルト) スタージングの状態も戻します。作業ディレクトリは戻しません。
- –hard ステージング、作業ディレクトリとも戻します。 ファイルの削除も行われます。 Pushしていないあるコミットまで完全に戻したいときはこれを使います。
untracked fileを削除
https://qiita.com/tmyn470/items/c8359e4ec92d1f462bdf
diff
ファイルの差分表示
// 差分表示
$ git diff bd4d592..e1669b5 -- src/Example.js
デフォルトでは差分は、unified形式で表示されます。
上記コマンドは以下のオプション付きコマンドと同じです。
$ git diff -p bd4d592..e1669b5 -- src/Example.js
$ git diff -u bd4d592..e1669b5 -- src/Example.js
$ git diff --patch bd4d592..e1669b5 -- src/Example.js
-p, -u, –patch Generate patch (see section on generating patches). This is the default.
ディレクトリの差分表示
// 差分表示
$ git diff bd4d592..e1669b5 -- src/
- ファイルはgit initをしたディレクトリからの相対パス
- 古いブランチ(bd4d592)が前で新しいブランチ(e1669b5)が後ろ
ブランチ間差分
$ git diff branchA..branchB
変更のあるファイル名のみ表示します。
git diff branchA..branchB --name-only
git checkout foo
git diff bar
// 以下と同じ
git diff foo..bar
Gitの追跡停止
git rm はインデックスから追跡を削除し、既定では作業ツリーのファイルも削除します。
git rm ファイル              // オプションなしのとき作業ツリーからも削除します。
git rm -r ディレクトリ        // オプションなしのとき作業ツリーからも削除します。
–cachedオプションを指定したときステージからのみ取り除き作業ツリーへは残します。
git rm --cached ファイル           // ステージからのみ取り除き作業ツリーへは残します。
git rm --cached -r ディレクトリ     // ステージからのみ取り除き作業ツリーへは残します。
--cachedオプションをつけたときは.gitignoreへ追加しないと次回のaddで追加されます。
log
git log
$ git log --graph --all --oneline --decorate
// --decorateはなくても良い
※ allを追加するとすべてのブランチを含んだログを表示。
$ git log --date="iso" --pretty=format:"%h: %ad %s" -5
特定ファイルの変更のみを表示
$ git log --oneline --shortstat /path/to/target/file
日付をyyy-mm-dd hh:ii:ssへ変更
$ git log --date=iso-local
以下のコマンドで~/.gitconfigへ設定が書き込まれるのでグローバルに設定できる。
$ git config --global log.date iso-local
設定された値は、以下のとおり。
# .gitconfig
[log]
        date = iso-local
log-graph
git logのカスタマイズ例です。git log-graphというコマンドを作成します。
日付は 2 months agoという形式で出力するバージョン
[alias]
log-graph = log --graph --all --pretty=format:'%Cred%h%Creset -%C(yellow)%d%Creset %s %Cgreen(%cr) %C(bold blue)<%an>%Creset' --abbrev-commit --date=relative
日付を正確に出力するバージョン
[alias]
log-graph = log --graph --all --pretty=format:'%Cred%h%Creset -%C(yellow)%d%Creset %s %Cgreen(%cI) %C(bold blue)<%an>%Creset' --abbrev-commit --date=relative
detached HEAD
孤立したHEAD/引き離されたHEADはなにかからHEADが孤立して言う状態を指します。 HEADがなにから孤立(引き離されて)しているかというとブランチから孤立しています。
detached HEADを解消するにはブランチをcheckoutします。
$ git checkout master // masterへHEADがatachされます。
detached HEADがはおもにコミットハッシュをcheckoutした場合に起きます。
$ git checkout <commit hash>
detached HEAD から脱出する方法を git の内部構造から探る - Qiita
強制的にgit add
git add -f path/to/target
リベース中止
git rebase --abort
リポジトリ管理されているファイル一覧
git ls-files
GitHub
SSH
- SSHカテゴリ https://help.github.com/articles/connecting-to-github-with-ssh/
- 新規キー作成 https://help.github.com/articles/generating-a-new-ssh-key-and-adding-it-to-the-ssh-agent/
セットアップ
git init
git add README.md
git commit -m "first commit"
git remote add origin git@github.com:example/example.git   // ---(1)
git push origin master                                       // ---(2)
// git push origin master:masterと同じです。
(1) リモートリポジトリgit@github.com:example/example.gitをoriginとして登録します。 (2) ローカルリポジトリのmasterブランチをリモートリポジトリのmasterとしてpushします。 ローカルリポジトリにmasterとorigin/master(リモートトラッキングブランチ)が作成されます。
リポジトリとブランチ
ローカルリポジトリとリモートリポジトリがあります。
- リモートリポジトリ 例 origin
- リモートブランチ 例 master
- ローカルリポジトリ
- ローカルブランチ 例 master
- リモートトラッキングブランチ origin/master
Push
$ git push origin bar:foo
ローカルブランチbarを、リモートブランチfooへPushします1。
$ git push origin :foo
リモートブランチfooを削除します。
Gitコマンドについて調べる【git push】 - blog @kimromi
Pull
$ git pull origin foo:bar
originに登録したリモートリポジトリgit@github.com:example/example.gitのfooブランチをローカルリポジトリのbarブランチへPullします。
$ git pull origin pullしたいリモートブランチ名:ローカルブランチ名
knowledge_base/リポジトリ内の特定のブランチをpullしたい.md at master · uniba/knowledge_base
ブランチをPull
sampleブランチを例に記載。
sampleブランチがローカルに存在する場合
originのsampleブランチをローカルのsampleブランチにPull。
$ git checkout sample
$ git pull origin sample:sample
【注意】sampleブランチがローカルにない存在しない場合は以下のようになってしまう。
$ git pull origin sample:sample
sampleブランチ作成masterにリモートのsampleをマージ(← この挙動がなぜ発生するかがわからない)
sampleブランチがローカルに存在しない場合
$ git fetch origin foo
$ git checkout foo
なぜ上記でブランチを取得できるかは以下の備考を参照。
備考
リモートトラッキングブランチはローカルにあり、リモートのブランチを監視しています。
$ git checkout master
$ git fetch origin master // ローカルのリモートトラッキングブランチ(origin/master)へoriginのmasterブランチの変更を取得します。
$ git merge origin/master // リモートトラッキングブランチの変更内容をローカルブランチへマージします。
| [gitのふわっとした知識を調査してみた | ねこブログ](https://nekosoftware.wordpress.com/2015/02/03/git%E3%81%AE%E3%81%B5%E3%82%8F%E3%81%A3%E3%81%A8%E3%81%97%E3%81%9F%E7%9F%A5%E8%AD%98%E3%82%92%E8%AA%BF%E6%9F%BB%E3%81%97%E3%81%A6%E3%81%BF%E3%81%9F/) |
PRをPull
クローン(clone)
$ git clone git@github.com:example/example.git
git@github.com:example/example.gitリポジトリのローカルリポジトリをexampleディレクトリへmasterとorigin/masterとして用意します。
特定ブランチのクローン
$ git clone -b release/5.7.5.8 https://github.com/concrete5/concrete5.git
https://github.com/concrete5/concrete5.git リポジトリのrelease/5.7.5.8ブランチをクローンします。
クローン後に他者が作成したブランチをチェックアウト
# リモートブランチを確認
$ git branch -r
# 一覧になければリストを更新
$ git fetch --prune
# 目的のブランチをローカルへチェックアウト
$ git checkout -b local_branch_name origin/remote_branch_name
- http://qiita.com/YusukeSuzuki@github/items/3bd5752783fd2c2f8805
- https://qiita.com/utano320/items/89d16bbc3db9a90c2735
Rebase
sampleブランチでgit rebase masterしたあとにPushしたときに発生。
hint: Updates were rejected because the tip of your current branch is behind
hint: its remote counterpart. Integrate the remote changes (e.g.
hint: 'git pull ...') before pushing again.
hint: See the 'Note about fast-forwards' in 'git push --help' for details.
a--b--c (リモート)

a--b--a'--b'--c'--d'--e'--c (ローカル)

※ a'--b'--c'--d'--e'はmasterからrebaseされたコミット
解決策
$ git push --force-with-lease origin sample
登録公開鍵確認
https://github.com/example.keys
GitHub機能
- Issue
- Pull Request
- GitHub Flow
Issue
コミットとIssueの関連付け
コミットメッセージへ#番号を含めます。 #番号がIssueへのリンクとなります。
注意 先頭の#をコメントと認識しますので先頭以外へ記載します。
NはIssueとPull Requestの通し番号で振られる値です。
コミットから関連Issueをクローズ
コミットメッセージへ下記内容を含めます。
- fixed #N
- closed #N
- resolved #N
NはIssueとPull Requestの通し番号で振られる値です。
Pull Request
最もシンプルな方法
- ブランチ作成 ローカル
- ブランチへコミット ローカル
- ブランチをPush ローカル
- Pull Request作成 GitHub
GitHub Flow
GitHub実践入門(p200)
1 masterブランチは常にデプロイできる状態とする 2 新しい作業をするときはmasterブランチから記述的な名前のブランチを作成する 3 作成したローカルリポジトリのブランチにコミットする 4 同名のブランチをGitHubのリポジトリに作成し、定期的にpushする 5 助けてほしいときはフィードバックが欲しいときはPull Requestを作成し、PUll Requestでやり取りする 6 ほかの開発者がレビューし、作業終了を確認したらmasterブランチにマージする 7 masterブランチへマージしたら、ただちにデプロイする
Pull Request Tips
- インラインコメントを記述できます。
- Pull Requestを作成した後でも随時コミット、pushできます。
Private Acccess Token(GitHub OAuth token)
アクセスを繰り返すとGitHub OAuth tokenを求められます。
Could not fetch https://api.github.com/repos/<reponame>, please create a GitHub OAuth token to go over the API rate limit
Head to https://github.com/settings/tokens/new?scopes=repo&description=Composer+on+user.local+2015-09-15+0000
to retrieve a token. It will be stored in "/Users/user/.composer/auth.json" for future use by Composer.
Token (hidden):
Head to httpsで始まる行のURLへアクセスしTokenを発行します。
Head to https://github.com/settings/tokens/new?scopes=repo&description=Composer+on+user.local+2015-09-15+0000
発行したTokenをComposerへ設定します。
$ composer config --global github-oauth.github.com <token>
Webhooks
GitHubでイベントが発生すると登録済みアプリケーションへ通知されます。
例) example/my-sawai-ojt3リポジトリで登録しているWebhooks
https://github.com/example/my-sawai-ojt3/settings/hooks
- Slack連携
- CircleCI
Issue\PRを期間を指定して検索
[GitHub] 特定の期間に close した issue, pull request を検索する
トラブルシューティング
The GitHub credentials in the macOS keychain may be invalid. 方法1 Clear them with:
printf "protocol=https\nhost=github.com\n" | git credential-osxkeychain erase
方法2 Or create a personal access token: https://github.com/settings/tokens/new?scopes=gist,public_repo&description=Homebrew and then set the token as: export HOMEBREW_GITHUB_API_TOKEN=”your_new_token”
git-pr-release
git-pr-releaseはreleaseブランチが作成されていることが前提。
作成されていないとエラーになる。
- CircleCIのプロジェクトのEnvironmentに
GIT_PR_RELEASE_TOKENを追加- はOrganizationのcontextで
GIT_PR_RELEASE_TOKENを設定しているので不要
- はOrganizationのcontextで
.circle/config.ymlに追加- ルートに
.git-pr-releaseを作成 - ルートに
.git-pr-release-templateを作成
  git-pr-release:
    docker:
      - image: circleci/ruby:latest
        environment:
          TZ: "/usr/share/zoneinfo/Asia/Tokyo"
        auth:
          username: $DOCKERHUB_USERNAME
          password: $DOCKERHUB_PASSWORD
    working_directory: ~/repo
    steps:
      - checkout
      - run: sudo gem install -N git-pr-release
      - run: git-pr-release

workflows:
  version: 2
  build_and_test:
    jobs:
      - build:
          context:
            - dockerhub-creds
            - korisu-personal-access-tokens-at-github
      - git-pr-release:
          context:
            - dockerhub-creds
            - korisu-personal-access-tokens-at-github
          filters:
            branches:
              only:
                - master
# .git-pr-release
[pr-release]
  template = .git-pr-release-template

[pr-release "branch"]
  staging = master
  production = release
# .git-pr-release-template
Release <%= Time.now.strftime("%Y-%m-%d %H:%M:%S") %>
<% pull_requests.each do |pr| -%>
- #<%= pr.pr.number %> <%= pr.pr.title%>
<% end -%>
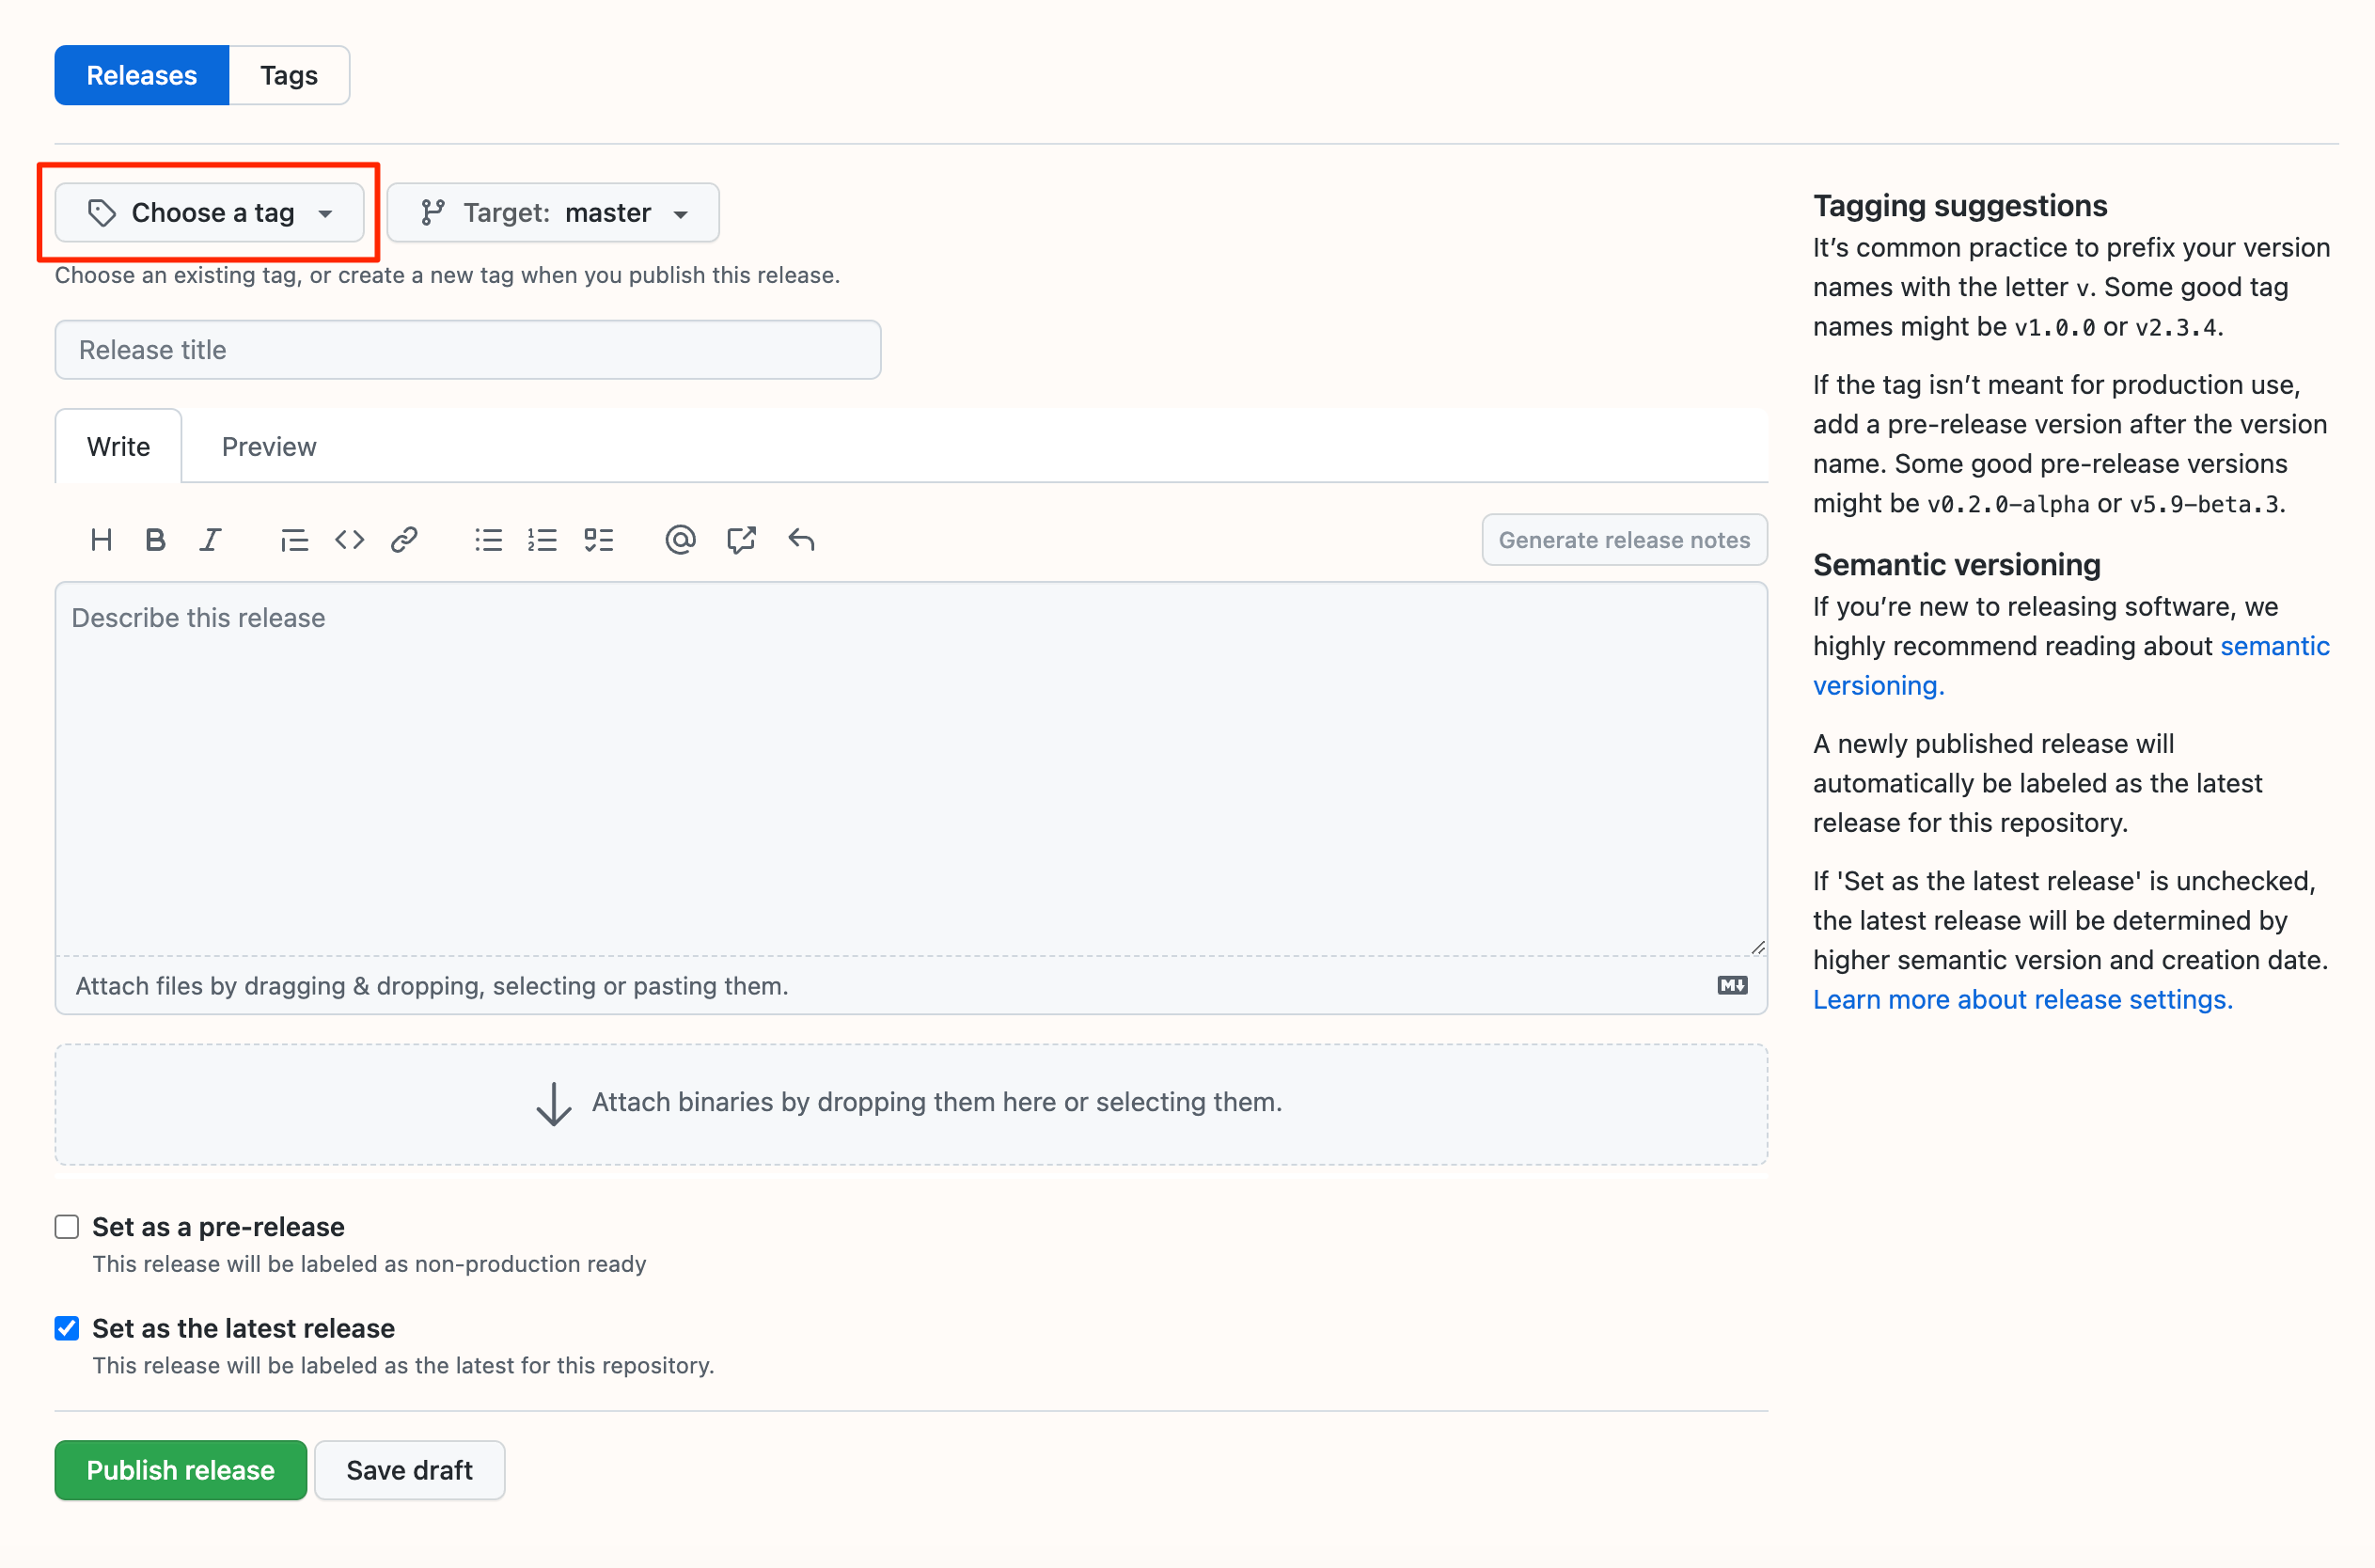
Release
Releaseをpublishするにはタグ(release tag)を付与する。
トラブルシューティング
fatal: Not a git repository (or any of the parent directories): .git
現象
すべてのgitに対して下記エラーが表示されるようになった。 直前までは正常に操作できており.gitディレクトリは存在する。
fatal: Not a git repository (or any of the parent directories): .git
対処
git initコマンドを実行すると正常な状態に戻った。
git initコマンドは、既存のリポジトリを上書することはないので、履歴は残っていた。
Running git init in an existing repository is safe. It will not overwrite things that are already there.
調査したこと
以下永井さんに指示をいただき調査のため以下を実行。
- エラーが表示される状態のディレクトリを複製
git initコマンドで元に戻ったディレクトリと複製したディレクトリで差分を表示(diff -ur directory1 directory2)
エラーが表示されるディレクトリには、.git/HEADファイルが存在していなかった。
git initで.git/HEADが作成されたことで解決したと考えられる。
その後、自宅でHEADを削除して見ると同じエラーメッセージが表示され、git initを実行すると.git/HAEDが作成され、履歴も残っていたので.git/HEADが削除されたことが原因だと言える。
ただ手動で.git/HEADを削除することは考えられないので、
入社後のまなび
git
事前に設定しておくこと
- 開発フローでmasterへコミットすることは原則ない。設定でmasterへコミット出来ないようにする https://社内ドキュメント
- WIPでrebaseしたコミットをpushする時は
git push --force-with-leaseを使う https://qiita.com/wMETAw/items/5f47dcc7cf57af8e449f - .gitignore-global
git config --global core.excludesfile ~/.gitignore_globa- gitignore_globalへ無視したいアセットを記載する。
文字単位で変更箇所を表示
- git diffで文字単位で変更箇所を表示する(後藤さんより情報提供を受ける)
前提
gitはbrewでインストール済みとします。 (brewでインストールしたプログラムは/usr/local/Cellar/にインストールされます。) インストールじバージョンは2.14.2でインストール先はgitは/usr/local/Cellar/git/2.14.2でした。
作業
- gitをHomebrewでインストール
- diff-highlightのシンボリックリンク作成
- .giconfigで設定処理追加
brewでgitをインストール
$ brew install git
シンボリックリンク
ln -s /usr/local/share/git-core/contrib/diff-highlight /usr/local/bin/diff-highlight
Homebrewは/Cellar/git/2.13.3/share/git-core/contrib/diff-hightlightへインストールされます。 /usr/local/share/git-coreは/Cellar/git/2.13.3/share/git-coreのシンボリックリンクです。
.gitconfig
ユーザーディレクトリの.gitconfigへ下記を追加します。
[pager]
	log = diff-highlight | less
	show = diff-highlight | less
	diff = diff-highlight | less
git stash
git stash show stash@{0} // stash0の概要
git stash show stash@{0} -p // stash0の内容表示
-
gitに関する情報を得られて嬉しかった。 [Git excludeファイルにローカル環境だけ無視したいファイルを登録 - Tbpgr Blog](http://tbpgr.hatenablog.com/entry/20130610/1370873259)
pre-commit
/path/to/project/.git/hooks/pre-commitファイルへシェルを記載できる
pre-commit
composer cf-fix
プロジェクトでローカルのファイルのみ無視
| [Git | excludeファイルにローカル環境だけ無視したいファイルを登録 - Tbpgr Blog](http://tbpgr.hatenablog.com/entry/20130610/1370873259) |
GitHub
- Issue
- Pull Request
- GitHub Flow
Issue
コミットとIssueの関連付け
コミットメッセージへ#番号を含めます。 #番号がIssueへのリンクとなります。
注意 先頭の#をコメントと認識しますので先頭以外へ記載します。
NはIssueとPull Requestの通し番号で振られる値です。
コミットから関連Issueをクローズ
コミットメッセージへ下記内容を含めます。
- fixed #N
- closed #N
- resolved #N
NはIssueとPull Requestの通し番号で振られる値です。
Pull Request
最もシンプルな方法
- ブランチ作成 ローカル
- ブランチへコミット ローカル
- ブランチをPush ローカル
- Pull Request作成 GitHub
GitHub Flow
GitHub実践入門(p200)
1 masterブランチは常にデプロイできる状態とする 2 新しい作業をするときはmasterブランチから記述的な名前のブランチを作成する 3 作成したローカルリポジトリのブランチにコミットする 4 同名のブランチをGitHubのリポジトリに作成し、定期的にpushする 5 助けてほしいときはフィードバックが欲しいときはPull Requestを作成し、PUll Requestでやり取りする 6 ほかの開発者がレビューし、作業終了を確認したらmasterブランチにマージする 7 masterブランチへマージしたら、ただちにデプロイする
Pull Request Tips
- インラインコメントを記述できます。
- Pull Requestを作成した後でも随時コミット、pushできま
コミットメッセージ
- コミットメッセージは分かり易く
Tips
直前のコミットで不必要な部分をステージングへ追加した
- HEADをステージングへ展開(
$git reset HEAD) - ワークツリーで必要な内容を追加(
$ git add -p)
Your branch is ahead of ‘origin/master’ by ○ commits
https://stackoverflow.com/questions/16288176/your-branch-is-ahead-of-origin-master-by-3-commits#:~:text=This%20message%20from%20git%20means,%7D%20%7Bremote%20branch%20name%7D%20.
上記リンクの以下コマンドを実行。
$ git reset --hard origin/master
-
Pullと指定が逆になることに注意してください。 ↩